Dashboard and Sessions#
Sessions usually represent a user’s usage of an instrument (e.g., data collection on a microscope). For CryoEM, microscope sessions are mainly used to screen the sample quality or collect images from the desired specimen. In most cases, it is convenient to perform on-the-fly data processing to evaluate the data quality further.
Dashboards in EMhub serve to launch a new session or to manage ongoing sessions.
Dashboards#
Dashboards are pages designed as the entry point for the facility’s daily operations. This is one of the templates that can be customized via the Instance Configuration. Usually, they provide ways to manage the existing bookings or create new ones.
The following are two examples of Dashboards, one used at SciLifeLab and the other at St.Jude.
At SciLifeLab, the Dashboard allows the creation of sessions for bookings in the current day, and shows upcoming bookings are shown as a list.

At St.Jude, the Dashboard displays the bookings for the current week and the access request for the next one. “It also enables the creation of sessions for bookings on the same day.”

Sessions#
New Session#
If there is a booking, a new session can be created from the New Session button shown in the microscope
(on the Dashboard page). After clicking the button, a
new dialog will appear to confirm the session information and its creation (see images below).
This dialog is another template that can be customized via the Instance Configuration.


A green box with the session name will appear after the session is created. Sometimes, more than one data acquisition can be done for the same booking, so more than one session can be created. After creating another session, more green boxes will be shown, as in the following image.
Creating a new session is commonly linked with some actions from Workers machines.
Workers will notice the new session and might perform some required tasks (e.g., folder creation,
data transfer, etc.). Workers can update the status of a session that is being monitored.
More information about workers can be found here: Developing Workers.
Session Details#
This page serves to show information for a given session. It is another template that can be customized via the Instance Configuration.


Sessions List#
Facility staff can see all sessions on the Sessions List page (accessible from
the Sessions link on the left toolbar). For non-staff users, only the sessions
related to them will appear in the list. From this list, one can easily access the
booking for a session or go to the session details. Staff users can also delete sessions.

On-the-fly Data Processing#
The EMhub’s REST API allows external programs to communicate with the system. One usage of this feature is the implementation of workers that perform On-The-Fly (OTF) data processing. The progress of the processing can be updated back to the associated session. Currently, OTF is implemented using Relion and Scipion as the underlying pipelines.
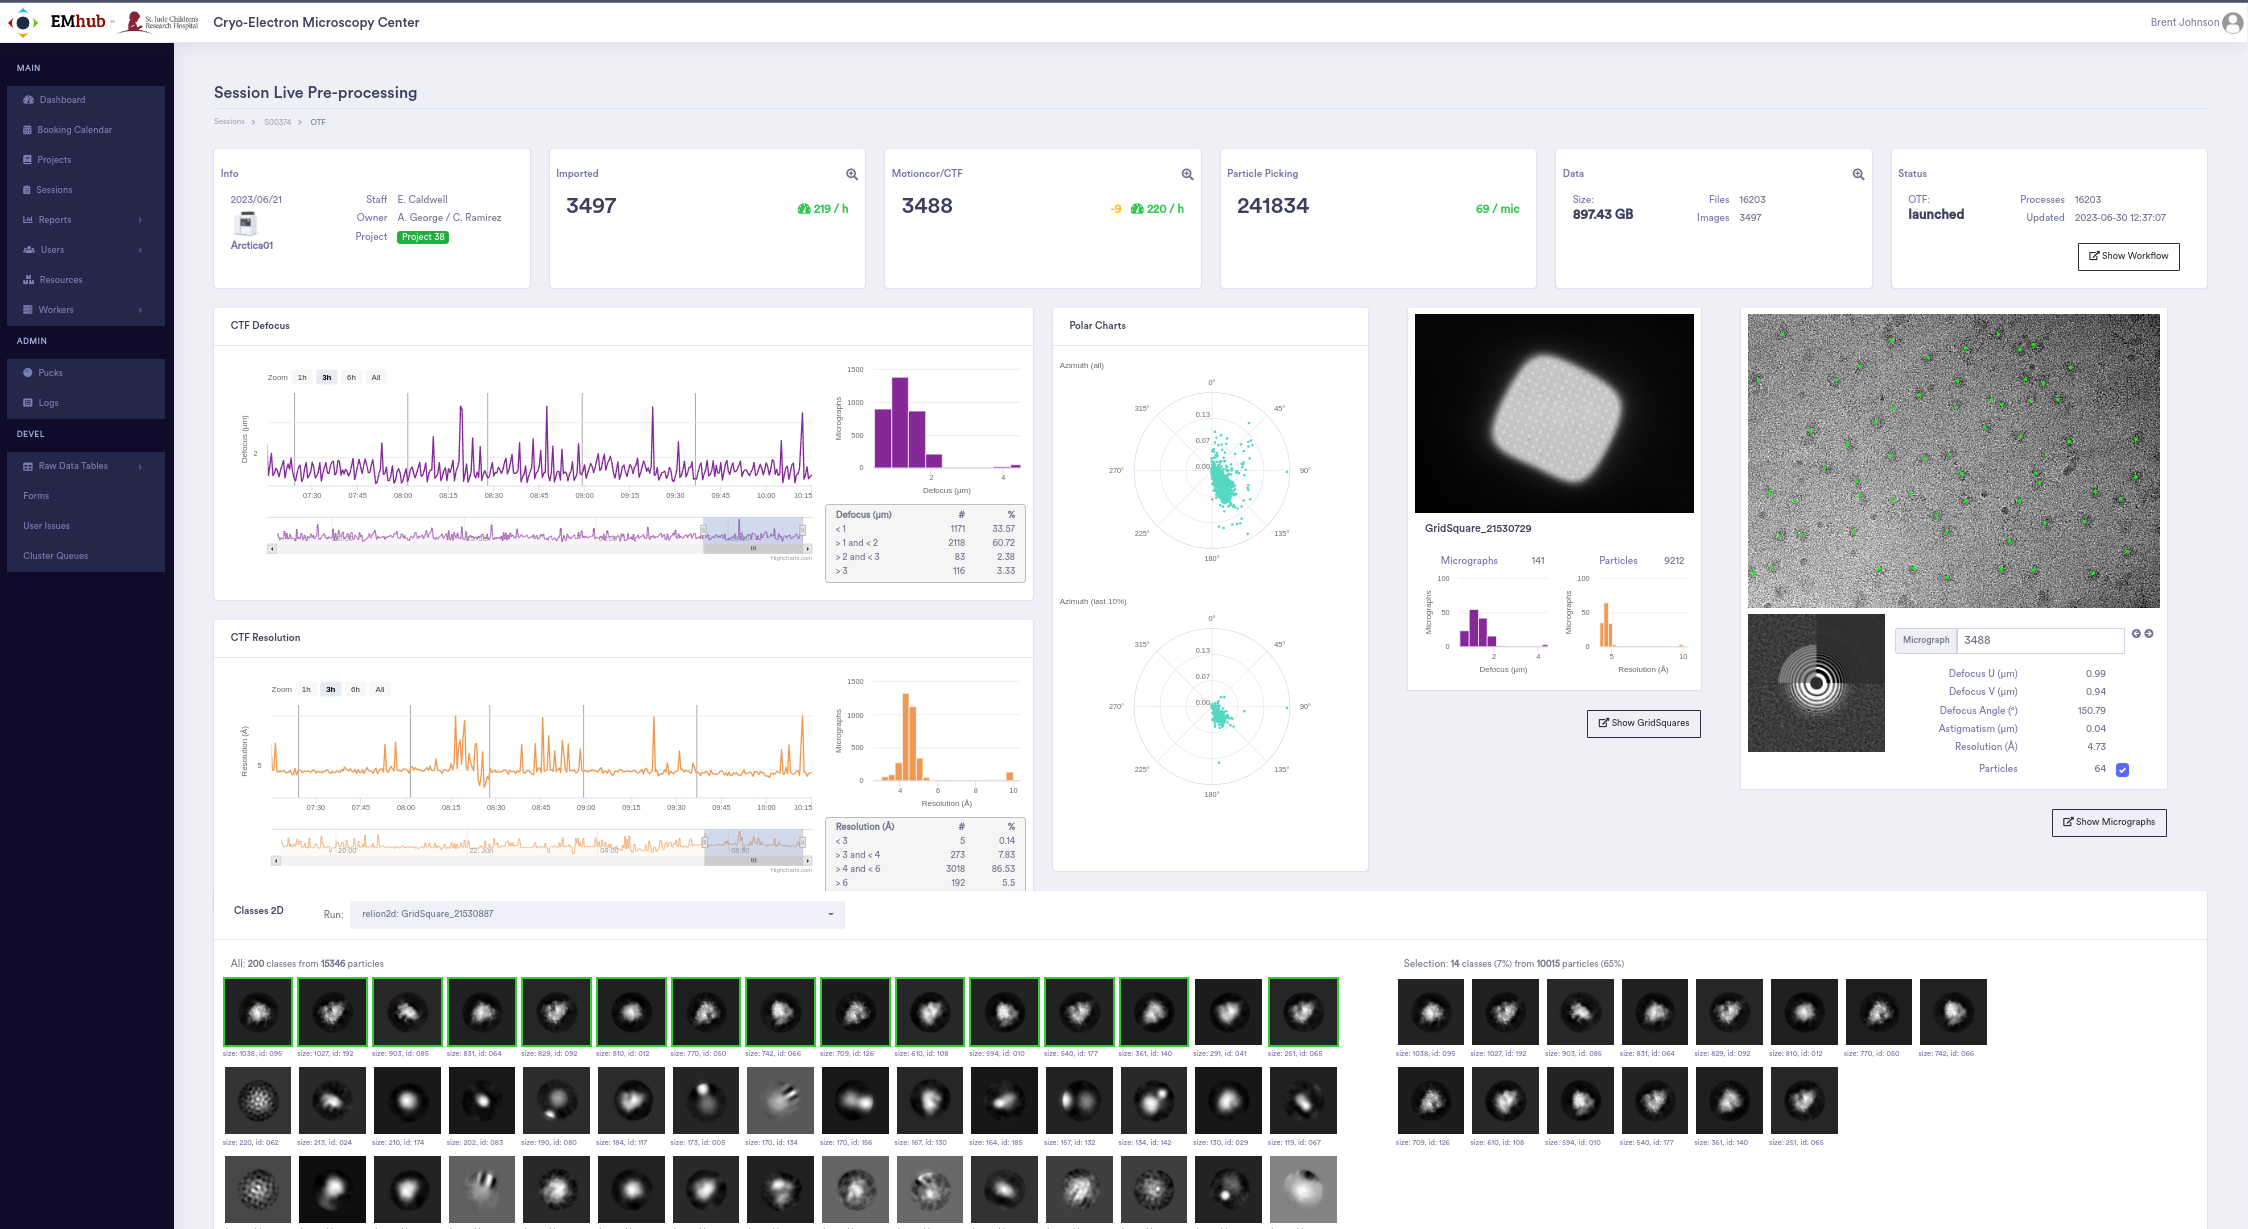
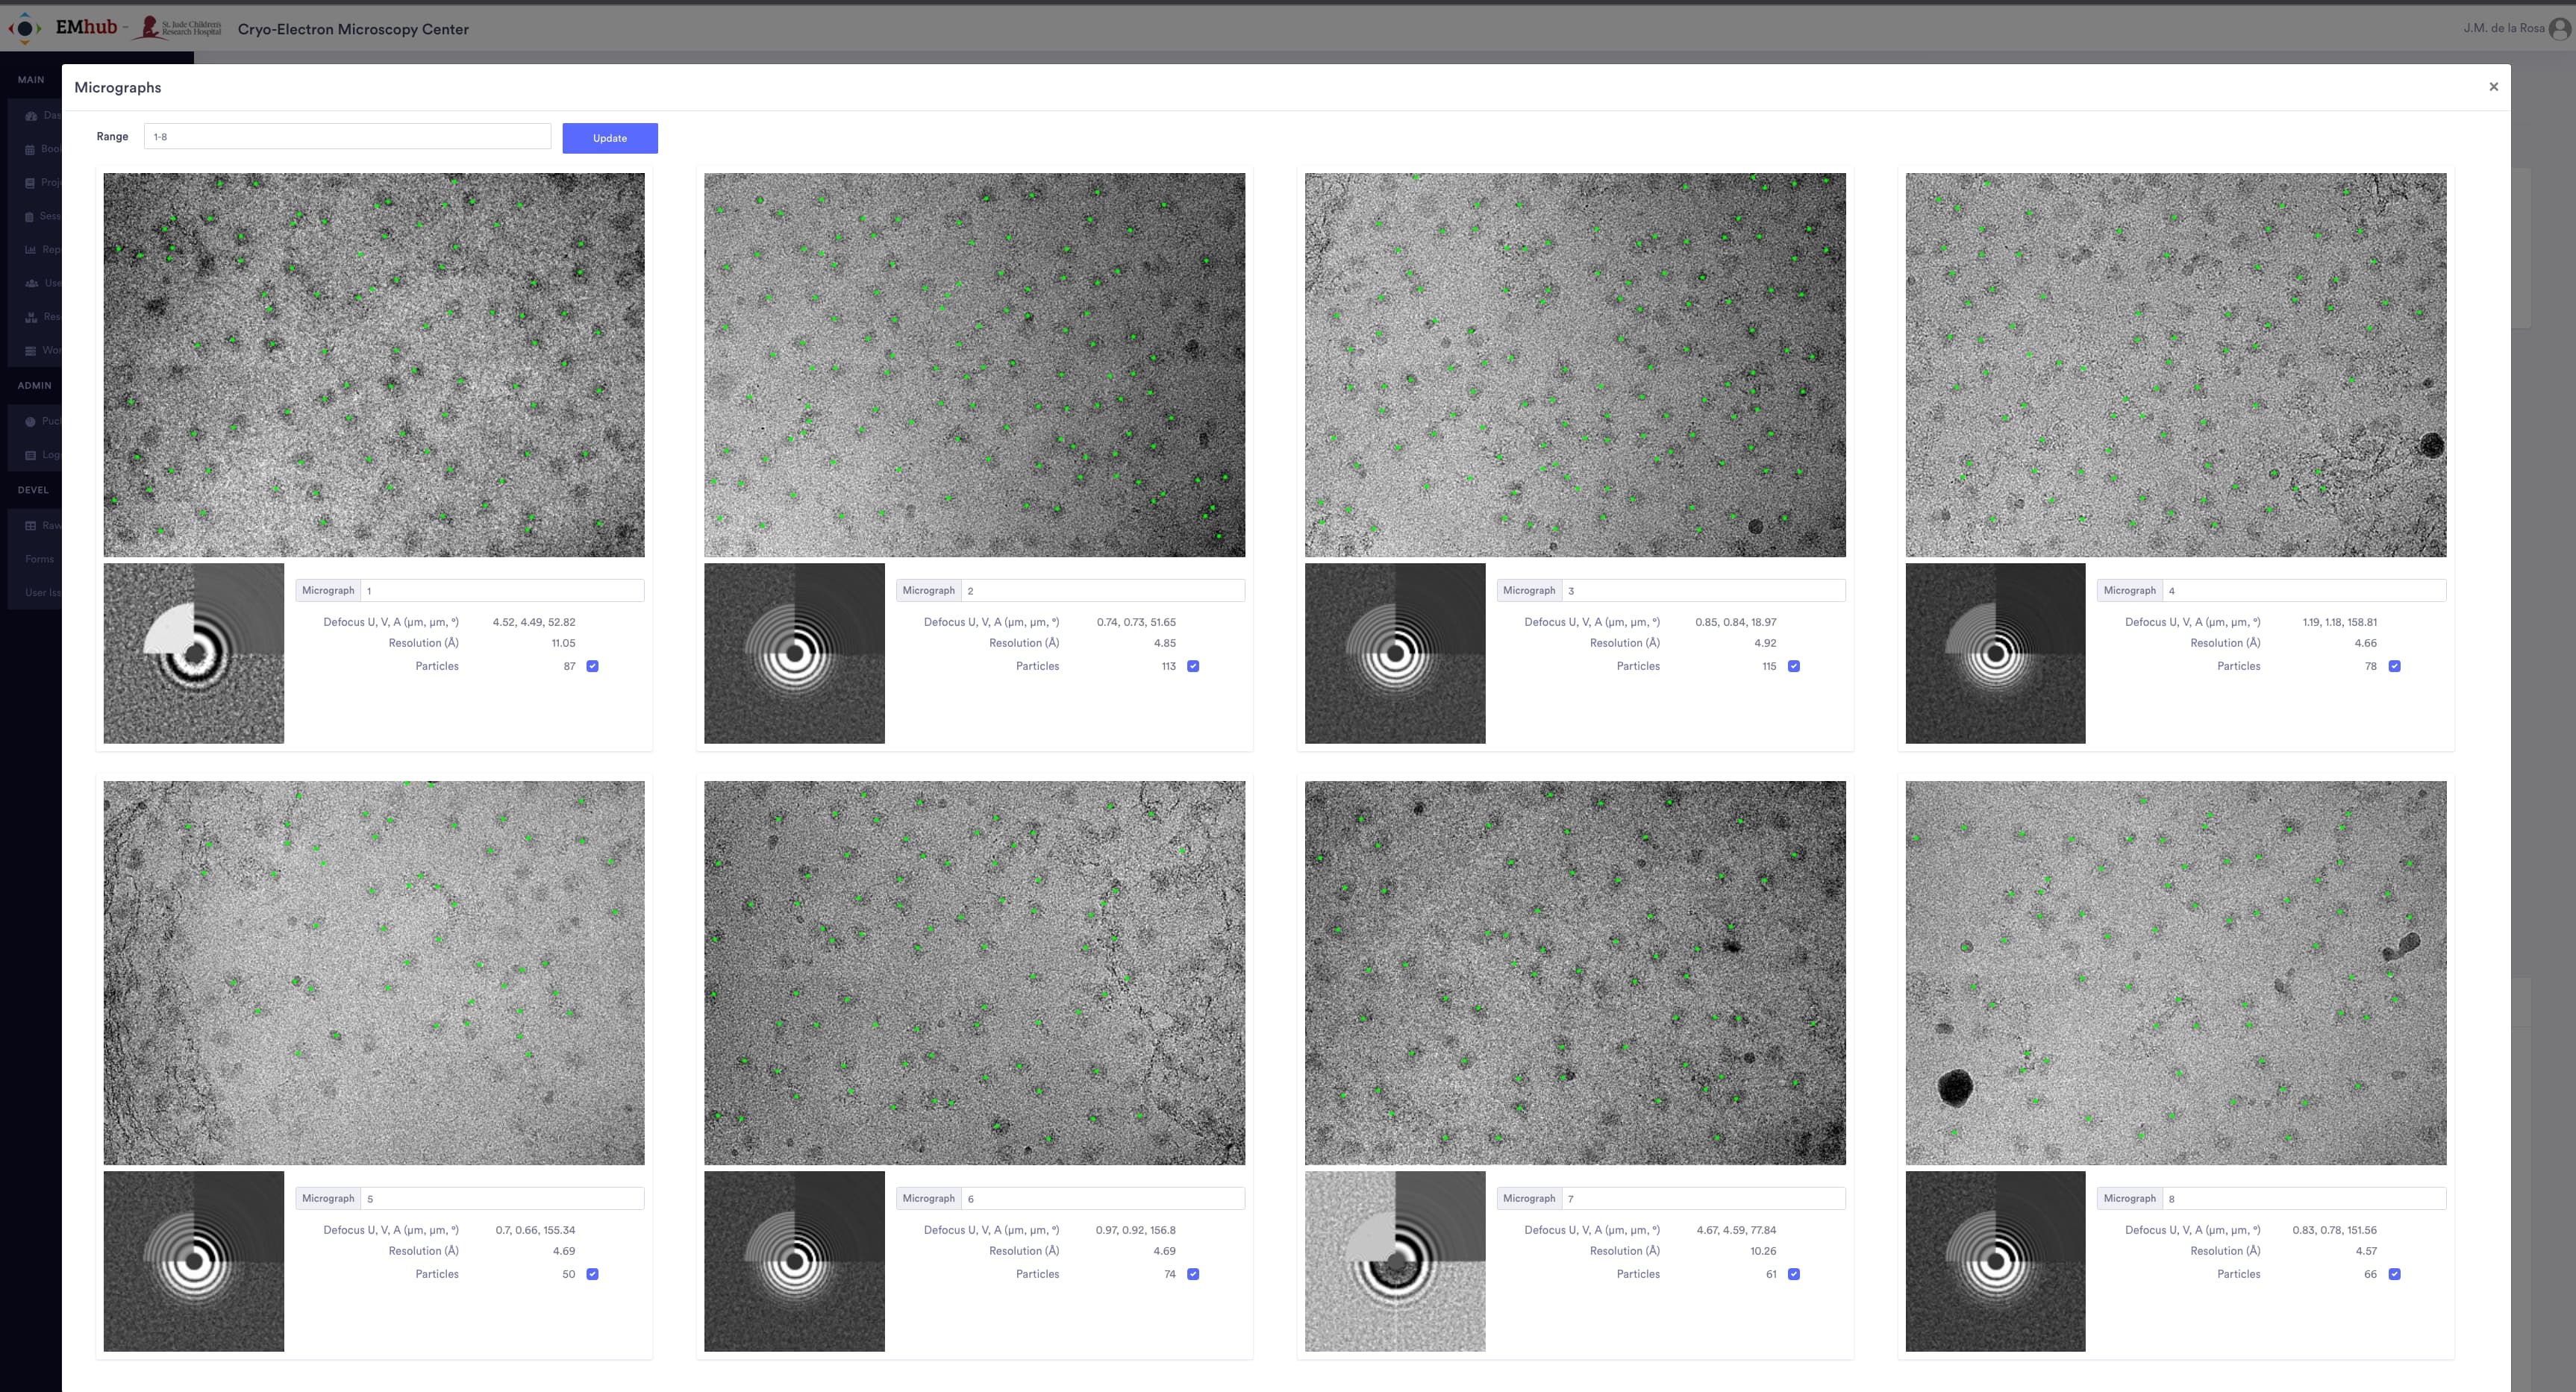
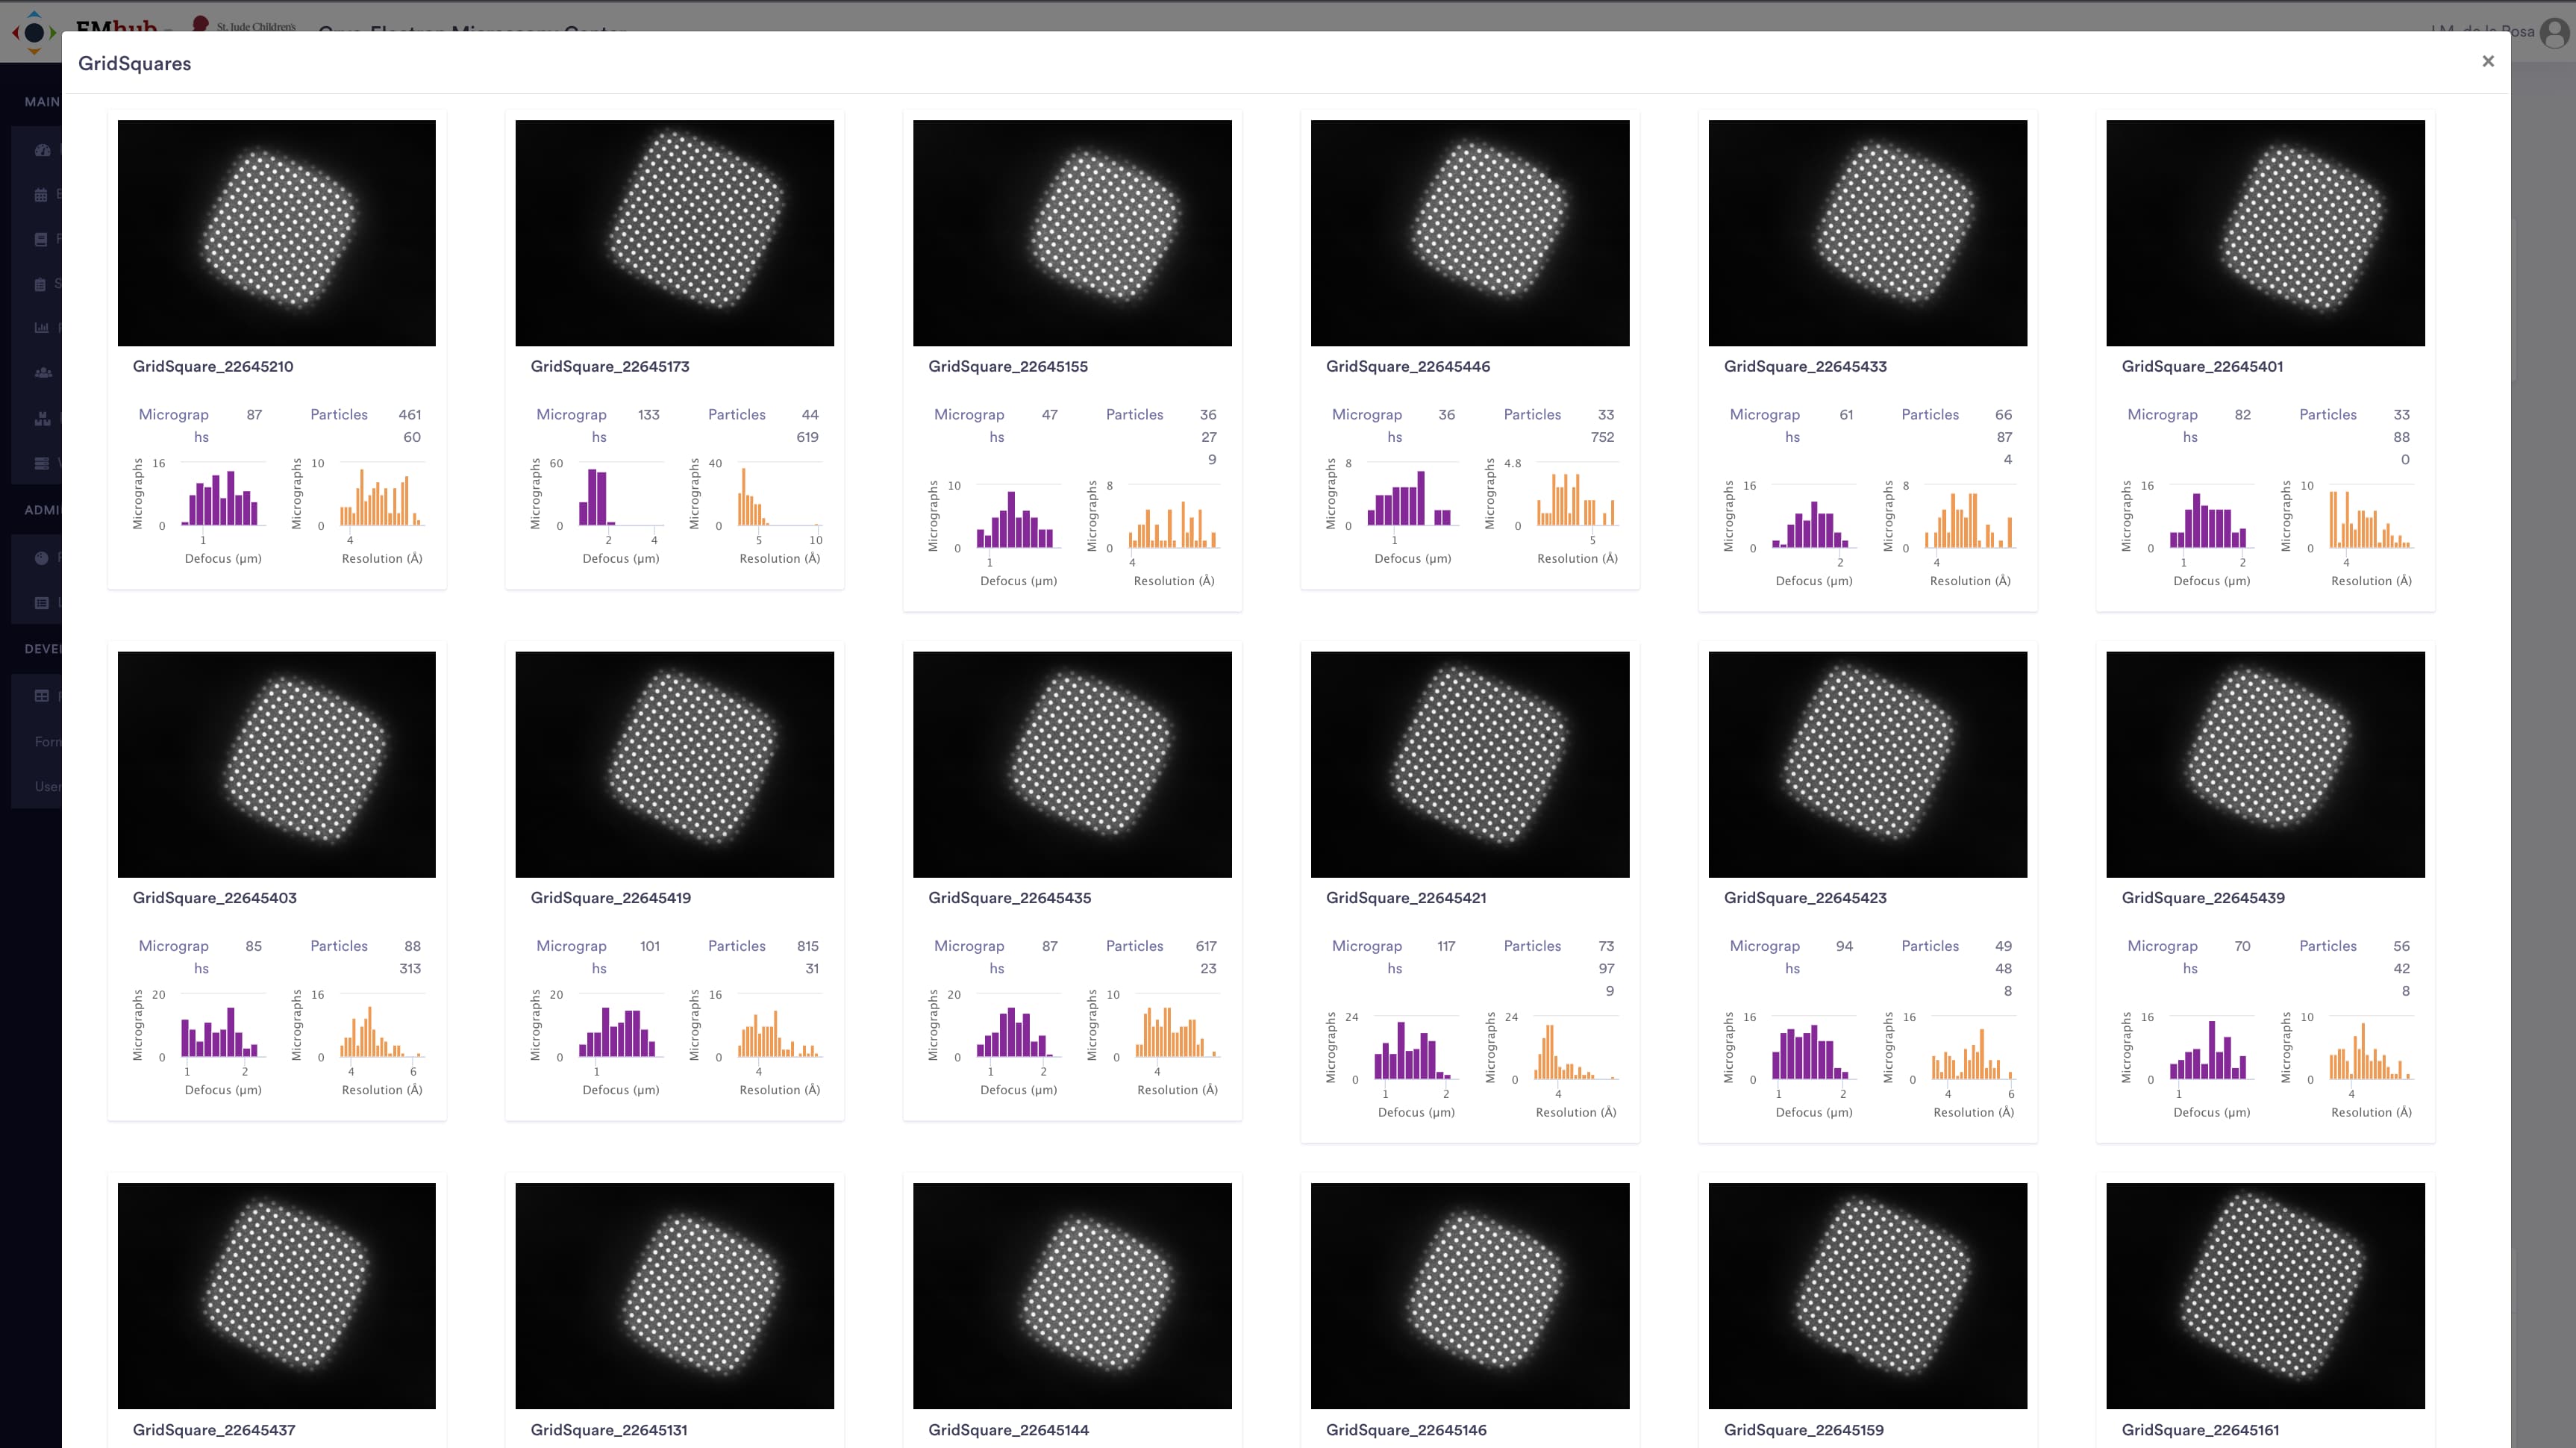
From that page, it is possible to show information per grid square or display several micrographs together, along with their CTF information and picked particles.
Map showing CTF and particle statistics per Grid Square:
Map with a few Micrographs and corresponding particles: